6 Inch Jointer Reviews – 2020 Top Picks and Buyer’s Guide

Shop Fox W1829 Benchtop Jointer, 6-Inch

Have you been reading 6-inch jointer reviews online? There’s no shortage as a lot of jointers can be purchased today, but choosing from the many options can overwhelming.

This is a concern for the first time buyer and I know how bewildering it is especially if you really need one right now.

If the above description fits you, I’ve explained the fundamentals in the buyer’s guide section. If you’re new to jointers and don’t know where to start, start with the guide.

If you’re looking for a specific product, please check out the reviews.

Top Six 6 Inch Jointer: Comparison

Product Cutterhead Fence Adjustment Dimensions Weight View on Amazon
Porter Cable 6 Inch Variable Speed Bench Jointer 2 knives, 6,000 –  11,000 RPM 90 to 135 degrees 32.1 x 12.4 x 11.2 inches 40.56 pounds Check Price
Cutech 40160H-CT 6″ Bench Top Spiral Cutterhead Jointer 2 knives, 11,000 RPM 90 to 135 degrees 32″ X 12 1/4″ X 11″ 40 pounds Check Price
Shop Fox W1829 Benchtop Jointer 2 knives, 10,000 RPM, 20,000 CPM (cuts per minute) 45 to 90 degrees 29.5 x 19.8 x 12.5 inches 80 pounds Check Price
Delta Power Tools 37-071 6 Inch MIDI-Bench Jointer 2 knives, 10,000 RPM, 20,000 CPM 45 to 90 degrees 35 x 17 x 13 inches 76 pounds Check Price
Grizzly G0725 6 by 28-Inch Benchtop Jointer 2 knives, 10,000 RPM, 20,000 CPM 45, 90, to 135 degrees 15 x 32.5 x 11.2 inches 81.15 pounds Check Price
Powermatic 1791317K 54HH 6-Inch Jointer Helical carbide inserts 45 to 90 degrees 66 x 24 x 37.5 inches 328 pounds Check Price

Best Picks of 6 Inch Jointer

#1: Porter Cable 6 Inch Variable Speed Bench Jointer

Porter Cable 6 Inch Variable Speed Bench Jointer
The Porter Cable is a versatile bench jointer for DIY, home improvement and other projects. It comes with a center mounted fence so edge jointing cuts get the necessary support.
The Porter Cable jointer has a sizable surface, allowing you to stock inches wide. Another nice thing about it is the built-in cutter headlock, as that makes knife adjustment and replacement simpler.

A close inspection shows it has a jackscrew knife and 2-knife cutter head arrangement, making a lot of your work easier.

The variable speed is the highlight for a lot of users though. With the 6,000 – 11,000 RPM range you can make the cuts as precise as it needs to be.

The jointer allows you to work up to 64” longboards. You can hook it up to a 2 1/2 vac via a reducing adapter.

Both the table and fence are built from solid metal, and the speed control works very well. Adjusting the fence and depth cut is easy but many users will find the default settings suitable for their needs.

Regarding the knives, they’re easy to replace and sharpen. Replacements are cheap enough but if you’d rather sharpen them it’s all right.

What I Like

  • 6500 – 1100 RPM
  • Easy knife replacement and adjustment
  • Excellent support during the entire process
  • Sufficient surface space
  • Cutter head integrated
  • Durable construction

What I Didn’t Like

  • Tightening knobs are made of plastic
  • Too much pressure causes the fence to move

Click Here To Find The Best Price Today

#2: Cutech 40160H-CT 6″ Bench Top Spiral Cutterhead Jointer

Cutech 40160H-CT 6" Bench Top Spiral Cutterhead Jointer
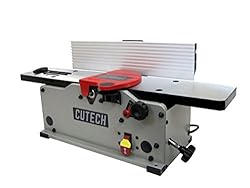
The 40160H-CT is a versatile tool designed for novices and serious DIY workers alike. It has 12 two-sided inserts so you get a high-quality finish.

A 2 and a half inch dust port is included, improving evacuation of chips and minimizing tear cut. The unit also has push blocks and all the essential tools for replacing and rotating cutter tips.

The 40160H has a 10 amp, 120-volt motor, more than enough for common tasks. Yet the jointer weighs only 40 lbs so it’s convenient to transport.

Made from heavy-duty materials, the 40160H has a maximum capacity of 30” x 6” x 1/8” (L W x D). The extra generous capacity makes this an excellent choice for some heavy-duty DIY work.

Its fence is 4 3/8” high by 19 5/8” and adjusts easily. You can adjust the tilt from 90 to degrees depending on what you need to do.

The aluminum table is well made and is one of the best spiral cutting types available. The fence and dust collector need to be attached but it’s easy to do.

The Cutech goes through hard and soft woods smoothly including 40” long red oaks without difficulty.

What I Like

  • Easy to adjust
  • Powerful motor
  • Adjustable fence
  • Push blocks included
  • Ideal for professionals and beginners
  • Excellent spiral type cutterhead

What I Didn’t Like

  • he guard could use a better design
  • Stock can be hard to push if you don’t wax it first

Click Here To Find The Best Price Today

#3:  Shop Fox W1829 Benchtop Jointer

Shop Fox W1829 Benchtop Jointer, 6-Inch
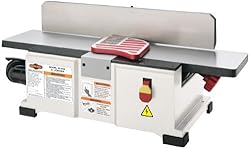
The W1829 is powered by a 12 amp, 60 Hz, 110 v 1 1/2 motor and does 20,000 cuts a minute. Its cutter head speed goes up to 10,000 RPM so you can do more work in less time.
The fence stops at 90 and 45 degrees, and it’s easy to adjust as well. Does your project need a different angle? Just stop the fence and set the appropriate angle.

This 6-inch jointer is made from heavy-duty cast iron that complements the fence for more efficient results.

You can set the bevel jointing to 45 degrees, and its impeller draws chips from the cutter head and sends them to the dust port. It also has a dust connector filter chute designed for use with galvanized trash cans.

With 1 1/2 HP there’s enough power here to handle most projects and tasks. The cast iron table is built to precision, and its vacuum mechanism does an excellent job managing shavings and dust.

The infeed table is easy to adjust for the tasks you want to do. The jointer weighs 80 lbs, giving it stability when you’re using it.

The W1829 also comes with a two-knife HSS cutter. This is an important feature as it keeps the cuts clean.

What I Like

  • Solidly built
  • Stable even when under heavy pressure
  • Dust port runs very well
  • Cuts cleanly
  • Powerful motor
  • Safety push blocks included

What I Didn’t Like

  • Setting up the fence could be easier
  • A better manual is needed though it’s easy to use

Click Here To Find The Best Price Today

#4: Delta Power Tools 37-071 6 Inch MIDI-Bench Jointer

Delta Power Tools 37-071 6 Inch MIDI-Bench Jointer
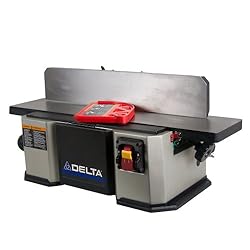
The Delta Power 37-071 jointer that supports depths 1/8 inches. Its fence system comes with stops at 90 and 45 degrees so you can work with greater precision.
The fence itself is made of cast iron and provides ample support for pinpoint jointing. This level of accuracy in both fence and table makes the Delta Power a handy choice for beginners and long-time jointer users.

The unit has 2 knives and is good for up to 20,000 cuts per minute. With the Delta Power 37-071 you can do a lot more precision jobs.

The Delta Power is easy to use and adjustment controls respond quickly. It’s a snap to hook up the dust port for easy cleaning.

The 37-071 is a well-made jointer and does what you expect it to. Aligning the fence takes a bit of time but when it’s set works out fine.

The 37-071 is suited for making furniture, crafts and other DIY projects. The jointer is particularly good for aligning pellet wood.

The 37-071 series has a good deal of power so you can use it on a 2×6. The blades last a long time but they are easy to replace if necessary.

What I Like

  • Made from durable materials
  • Supports up to 1/8” deep cuts
  • Doesn’t slip around
  • Fence doesn’t move once set
  • Great for precision work

What I Didn’t Like

  • Oil applied during shipping takes some effort to remove
  • A bit of wood shaving gets past the exhaust port

Click Here To Find The Best Price Today

#5: Grizzly G0725 6 by 28-Inch Benchtop Jointer

Grizzly G0725 6 by 28-Inch Benchtop Jointer
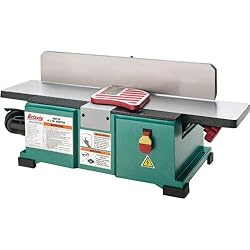
The G0725 is a compact but powerful jointer designed for small and large jobs alike. Running on a 1 1/2 hp motor, it allows you to do a lot more work without getting stressed.
The G0725 has a compact design so it won’t eat up as much space as other jointers. It also has a 45-degree bevel adjustment for greater precision when you’re crafting.

The cutting head knives are easy to adjust and the dust collection system keeps your workspace clean. There’s also an infeed table adjustment knob and the fence stops at 45, 90 and 135 degrees.

The mounting base is 19 1/2 x 10 1/2” so it does not occupy a lot of space when set up.  You can’t adjust the outfeed table, only the input side. However, this doesn’t affect the overall performance.

The G0725 runs consistently especially with short and medium size pieces. Getting the in and outfeed to work is easy too.

This is not the most powerful 6-inch jointer in the market, but it is suitable for small and light tasks. The G0725 should also appeal to pros who want a backup for their main jointer.

Whether you make wood toys or small furniture, this is one jointer that gets the work done.

What I Like

  • Powerful 1 1/2 HP motor
  • 10,000 RPM speed
  • Solid table
  • Easy to use
  • Dust port built in
  • 2 cutterhead knives

What I Didn’t Like

  • Not suited for very long pieces
  • The instruction manual needs improvement

Click Here To Find The Best Price Today

#6: Powermatic 1791317K 54HH 6-Inch Jointer with helical cutterhead

Powermatic 1791317K 54HH 6-Inch Jointer with helical cutterhead
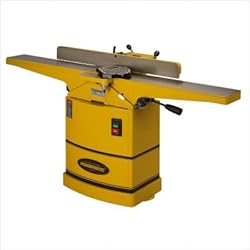
The 54HH 1317K 6 inch helical cutter head jointer designed for quieter and smoother operation. It has forty 4-sided knife inserts and built expressly for heavy-duty work.

The 54HH is equipped with a one-phase, 115/230 volt, 1 HP, one phase motor to handle whatever you throw at it. The motor is mounted so you can easily modify the belt tension when it’s necessary.

The infeed table comes with a rapid adjustment lever to make certain you’ll be able to cut with precision. A dust collector is also built-in so it keeps your working environment clean.

The 54HH also has a real helical cutter head design so you get maximum benefits. The inserts also come with a 4-inch radius ground for genuine 14-degree angle when cutting wood.

The 54HH also has a 66-inch long table, making it a great choice to work on long pieces. There’s also a handwheel under the table for feeding adjustment.

What I Like

  • Four sided knife inserts
  • Adjustable outfeed and infeed tables
  • Doesn’t male a lot of noise when cutting
  • Runs smoothly
  • Helical cutterhead
  • All steel base cabinet
  • Belt tension adjusts easily

What I Didn’t Like

  • Heavy
  • Needs assembly

Click Here To Find The Best Price Today

What is a Jointer?

This tool is used to create flat surfaces along a wood’s fence and edge. This tool is especially useful if you like to make your own furniture and other woodwork. Jointers today come with different features to make your tasks easier.

How to Choose the Best 6 Inch Jointer

  • Table Flatness: if it’s supposed to flatten materials, the surface must be flat and sturdy.
  • Firm: moderate pressure should not cause the jointer to bend.
  • Length: long tables leads to straighten lines. However, the ideal length depends on the project you’re working on.
  • Features: get a jointer with only the features you need. There’s no need to get long fences if you’re not going to use it.
  • Wheels vs. Levers: in-feed and out-feed adjustment are done via wheels or levers. Some prefer wheels while others like levers, it’s up to you.
  • Spinal Cutting Head: some of the newer jointers have 4 sided cutters arranged in such a way that makes it easy to slice wood.
  • Weight: the heavier the jointer is, the more stable it will be.
  • Dimensions: make sure your workspace is sufficient for the machine.

Final Verdict

Bench jointers are a dime in a dozen but the six products here stand out from the rest. Of the six through the Porter Cable Jointer is the best overall when it comes to features and performance.

What I like about the Porter Cable is its variable speed as makes it easy to find the right setting. I also like how convenient it is to replace knives when needed.

These 6-inch jointer reviews have shown how good these machines can be, but for maximum value and efficiency, I’d go with the Porter Cable.

Click Here To Find The Best Price Today

The Best Socket Set Reviews – 2020 Top Picks and Buyer’s Guide

Are you searching for the best socket set and not having much success? Every car owner, DIY buff or not, should have a good set of sockets, as they’re useful for making adjustments and fixing various problems.

But which socket set should you buy? There just seems to be so many options available.

This is where this guide may be able to help. I have years of experience working with sockets, and I chose only the best ones for this guide.

I have also prepared a detailed guide to help first-time buyers. So without further ado, let’s get down to the top picks.

Top 6 Socket Set: Comparison

Before we go to the socket set reviews I have prepared here a comparison chart so you can see the highlights of each one. As you can see I chose the SK 94547, the Craftsman and the Tekton 4888. For more details, however, you should check out the reviews.

Name Pieces Case Dimensions Weight View on Amazon
SK 94547 47 Piece 47 9.6 x 13.5 x 2.2 inches 8.5 lbs. Check Price
Craftsman 220 220 19 x 14 x 5 inches 20 lbs. Check Price
Tekton 4888 38 11 x 14.8 x 3.2 inches 13.2 pounds Check Price
BOSTITCH BTMT72287 65 3.3 x 14.2 x 11.2 inches 11 lbs. Check Price
Stanley Black Chrome Socket Set 99 24.2 x 3 x 15.2 inches 12 pounds Check Price
GearWrench 80550 57 18.7 x 11.4 x 2.8 inches 12.1 pounds Check Price

Top 3 Selections

SK 94547 47 PieceSK 94547 47 Piece 3/8-Inch Drive 6 Point Standard and Deep Socket Set with 20 Piece 1/4-Inch to 7/8-Inch and 24 Piece 6-Millimeter to 19-Millimeter Assortments Review
My pick is the SK 94547 47 Piece. Each piece is built to last and can be used even in difficult environments.

Corrosion won’t be an issue so you can use it as frequently as you like. Add the lifetime warranty and you have a complete set of sockets to handle your needs.

Best Value for the Money

Craftsman 220 pieceCraftsman 220 pc. Mechanics Tool Set with Case, # 36220 (Newest Version) Review
The Craftsman 220 piece mechanics tool set is comprehensive and made of high quality steel.

Craftsman makes a lot of quality tools and this set is one of the better ones they have, with real value. While competition is stiff, there is no questioning the quality of this set.

Best Budget Model

Tekton 4888TEKTON 3/8-Inch and 1/2-Inch Drive Impact Socket Set, Inch/Metric, Cr-V, 6-Point, 3/8-Inch - 1-1/4-Inch, 8 mm - 32 mm, 38-Piece | 4888 Review
The Tekton 4888 is ideal for those on a budget but still looking for quality sockets. It is inexpensive but offers solid performance and is well-made.

Tekton is a well-known brand and the 4888 shows why. With its superb design and versatility, this is an excellent choice for those on a budget.

Best Picks of Socket Set

Now let’s take a closer look at my top picks.

#1. SK 94547 47 Piece 3/8-Inch Drive 6 Point Standard and Deep Socket Set with 20 Piece 1/4-Inch to 7/8-Inch and 24 Piece 6-Millimeter to 19-Millimeter Assortments

SK 94547 47 Piece 3/8-Inch Drive 6 Point Standard and Deep Socket Set with 20 Piece 1/4-Inch to 7/8-Inch and 24 Piece 6-Millimeter to 19-Millimeter AssortmentsThe SK 94547 47 Piece is one of the best socket set for mechanic owing to its many features. The set includes 19 deep sockets, 25 standard sockets, 2 extensions and a 7-1/2-inch pro-ratchet.

This 3/8-inch drive 6-point metric / fractional set is built for long term use in harsh environments, and its SuperKrome finish makes it resistant to corrosion. The sockets are also strong enough to withstand regular use.

The 94547 uses the SureGrip hex design so it’s more comfortable to use. A close look reveals the socket has knurled grips to improve handling for complex operations.

The sockets sport a high finish so you’re able to use it in different situations. Since the sockets are corrosion resistant there’s no need to worry about intensive use.

With its SureGrip hex, the sockets drive on the fastener’s side, instead of the corner. This leads to smoother operation and prevents breakage.

A molded case is included so you don’t lose of the pieces, and it holds each one in place. This case is one of the most durable I have come across in a while.

What I Like

  • Designed for use in difficult environments
  • Has a lifetime warranty
  • Comes with standard sockets
  • Comfortable to hold
  • Resistant to corrosion

What I Didn’t Like

  • The exterior finish could be better
  • Doesn’t have as many pieces as other sockets

Bottom Line

The SK 94547 is a high quality set with all the essential sockets. It  may not have as many pieces as the best impact socket set, but there  is more than enough sockets here to satisfy the needs of DIY enthusiasts.

Click Here To Find The Best Price Today

#2. Craftsman 220 pc Mechanics Tool Set with Case 36220

Craftsman 220 pc. Mechanics Tool Set with Case, # 36220 (Newest Version)Depending on your budget, the Craftsman may qualify as one of the best cheap socket set. It certainly offers great value for your money as it has lots of pieces and accessories.

This Craftsman set comes with 116 sockets and quick release ratchets in ½, 3/8 and ¼ drives. The sockets are in universal and metric joints for greater flexibility.

The case includes a couple of extension bars and 6 combination wrenches in both metric and standard form. The set also includes a magnetic handle with a dozen nut drivers and several mechanic and screwdriver bits so you can work easily.

There are 128 sockets which come in ½, 3/8 and ¼ in. drive sizes so you can do detailed car work. There are also 6 wrenches, 3 ratchets with quick release and 40 hex keys.

The sockets come in standard and deep well sizes, allowing you to do complex work. Its carry case is durable and has sufficient space for all the bits and pieces.

What I Like

  • Constructed from quality alloy steel
  • Comes with lots of pieces
  • Metric and standard wrenches included
  • Has a solid finish
  • Quality construction

What I Didn’t Like

  • Only 3 metric end wrenches included
  • Ratchet handle is a bit small
Bottom Line

The Tekton vs Craftsman debate will go on for a while, but there is no question the 220 piece set is one of the best Craftsman has. With so many sockets there’s a good chance whatever size you want is here.

Click Here To Find The Best Price Today

#3. BOSTITCH BTMT72287 Pass Through Socket Set, 65-Piece

BOSTITCH BTMT72287 Pass Through Socket Set, 65-Piece
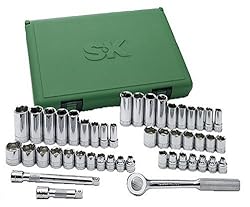
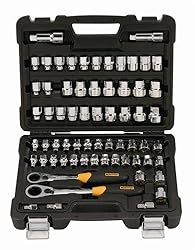
The Bostitch is one of the best socket sets for car maintenance owing to its heavy-duty sockets and ratchet. The set has a 72 tooth gear system which leads to easier ratcheting and superior torque.

The system also has a low arc swing, and its pass-through design means you can access fasteners that ordinary sockets cannot get into. The sockets’ size markings have been stamped so it’s easier to identify them.

The ratchet is as well-designed as the sockets, with the rubber handle making it comfortable to hold.

All the pieces have a high-quality finish and made from chrome vanadium steel, giving it strength and durability. The set also comes with a blow mold case to hold all the pieces together and provide protection.

This is a 65 piece set which includes all the most widely used sockets and wrenches. The most common sizes like half inch, 3/8 and others are here, and there are also metric drive sizes.

What I Like

  • Heavy duty ratchets and sockets
  • Construction is solid
  • Comfortable grip for ratchet
  • Sockets and ratchets can be used in different applications
  • Makes it easy to work with various fasteners

What I Didn’t Like

  • Case is a little bulky
  • Can be a bit difficult to remove the sockets from the ratchet

Bottom Line

If you’re searching for the best socket set for the money, the Bostitch is one that you should look into. It comes with a wide array of bits and pieces that you can use for car maintenance and work.

Click Here To Find The Best Price Today

#4. TEKTON 3/8-Inch and 1/2-Inch Drive Impact Socket Set, Inch/Metric, Cr-V, 6-Point, 3/8-Inch – 1-1/4-Inch, 8 mm – 32 mm, 38-Piece | 4888

TEKTON 3/8-Inch and 1/2-Inch Drive Impact Socket Set, Inch/Metric, Cr-V, 6-Point, 3/8-Inch - 1-1/4-Inch, 8 mm - 32 mm, 38-Piece | 4888The Tekton 4888 is comparable to the best Craftsman socket set as it includes the 1/2-inch and 3/8-inch 6 pt. sockets. The unit case also comes with dual-size sockets which have been heat treated and drop forged for extra durability.

These sockets are designed for use with impact wenches for faster loosening of fasteners. The design also makes it easy to use even in tight situations.

You can also use these on rusty exhaust and suspension bolts, allowing you to take out lug nuts with little difficulty. These are also what you would use for crank bolt loosening.

The Tekton offers superior performance as it moves torque into the fastener from the wrench. It is this feature that allows the Tekton to loosen even the most stubborn bolts.

Each socket is made of durable chrome vanadium steel so it doesn’t corrode. Because these are impact sockets, they have more power than regular sockets, extending their lifespan and durability.

The sockets’ design also allows it to hold nuts and bolts’ flat, broad sides rather than the corners. This leads to smoother operation.

What I Like

  • The sockets satisfies the ANSI performance prerequisites
  • Corrosion resistant
  • Includes several widely used sockets
  • Solid, beautiful finish
  • The case is solid but light

What I Didn’t Like

  • Only a thin foam keeps the sockets from tumbling in the case
  • The size list is a bit confusing

Bottom Line

As this Tekton socket set review has shown, the 4888 is a high quality product. It comes with the essential pieces for car maintenance and working with fasteners.

Click Here To Find The Best Price Today

#5. Stanley 92-839 Black Chrome and Laser Etched Socket Set, 99-Piece

Stanley 92-839 Black Chrome and Laser Etched Socket Set, 99-Piece
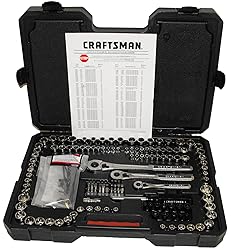
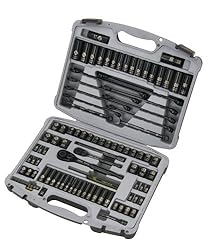
If you’re looking for the best socket wrench set, the Stanley is a good candidate as it comes with 99 pieces. All of the pieces have a black chrome finish, providing durability and long lasting finish.

The sockets and ratchets have been constructed so they pass the ANSI standards, giving you assurance of their quality. These sockets also sport the Max-Drive design so it generates more torque than the typical socket.

As anyone who’s used any sockets and wrenches will tell you, rusty bolts and tighten fasteners need a lot of torque to open. This is where a high torque socket ratchet set becomes important as they provide the muscle.

All the sockets have been stamped so it’s easier to identify them. The serration on the sockets has the same depth as the fasteners so it’s easier to use.

The quality is evident not just in the sockets but the other pieces as well. Its ratchet has low profile, and it is also larger for more convenient use.

What I Like

  • Comes with a lot of sockets in varying sizes
  • Durable case included
  • Sockets and wrenches are well designed
  • Meets ANSI standards
  • Wrenches are easy to hold

What I Didn’t Like

  • Case design and socket storage could be better
  • Sometimes the sockets are out of place upon delivery

Bottom Line

The Stanley set doesn’t just come with a lot of pieces, but each one is durable and designed to last. Meeting ANSI standards and designed to generate a lot of torque, the Stanley sockets are very reliable.

Click Here To Find The Best Price Today

#6. GearWrench 80550 57 Piece 3/8-Inch Drive 6 Point Socket Set

GearWrench 80550 57 Piece 3/8-Inch Drive 6 Point Socket SetWho makes the best socket sets? This is a question with no easy answer as everyone has their own opinion.

There are lots of bands to choose from, and one of the most popular is the April Tool Group thanks to products like the GearWrench. This is a 57 piece set that comes with the most widely used socket sizes so you don’t have to buy another set.

The ratchet’s reversing lever is flush mounted so there is better access. Another ratchet has a wide full-polish teardrop design, making it more versatile than others.

If you look at the sockets you will see each one has the numbers and sized stamped. Knurled (metric) and double lines (SAE) are also easier to identify due to the way it’s been designed.

The package comes with a wide range of sockets including deep and standard sockets, universal joints and extensions. With all these features it is easy to see why they are highly regarded by DIY buffs.

What I Like

  • The ratchets and sockets are well-designed
  • Capable of loosening even tight fasteners
  • Serration depth present in the sockets
  • Contains all popular socket sizes
  • Longer than usual ratchets allow for powerful leverage

What I Didn’t Like

  • Sockets sometimes rattle inside the case
  • Label etching quality not as good as on other sockets
Bottom Line

Most people go online to check for the latest Tekton socket set review, but the GearWrench is a good alternative thanks to its comprehensive approach and design. For a lot of people, this set will more than meet their needs.

Click Here To Find The Best Price Today

Why Do You Need a Socket Set?

Sockets let you loosen or tighten nuts and bolts. With the best ratchet set, torque or other turning tools, you can fix or adjust car engines, take out car wheels and other components.

A good screwdriver set is essential for the DIY enthusiast, but so are sockets. Sooner or later you will need to loosen or tighten something on your car, and you’ll need sockets to do it.

If you spend a lot of time working on your car, quality sockets are necessary. With several sockets in hand, you’ll be able to do a lot of mechanic work at home.

How to Choose the Best Socket Set

Picking the best socket set brand, or one you trust, is just one factor. Here are other factors to keep in mind.

Number of Pieces:

Small sets have just 13 or 20 pieces, while large ones have 200 or more than 500 pieces. However, not all these pieces are sockets as the “pieces” may include spanners, turning tools, screwdriver bits and other accessories.

The more pieces included:

The more versatile the set. The 500 piece sets, however, come in trolleys and aren’t portable.Large piece sets are more suitable for shops, but for car owners, small to medium size sets will do.

Look for sets that expand your tool collection, but focus also the sockets’ size and if they fit your needs.

Imperial or metric:

If you mostly work with metric fasteners, it’s all right to stick with metric sockets. The same rule applies if you are comfortable with imperial sockets.

However, if you’re going to spend any considerable time working with both sizes, it’s best to get sockets with imperial and metric sizes.

The drive size will be determined by the work you do. The best socket wrench set has a 3/8” drive ratchet as it is flexible enough to be used in different applications.

Different tasks require different drive sizes, so pick the sets that are suitable for the work you intend to do.

One of the benefits of using the 3/8” drive size is compatibility with ½ and ¼ sockets. You just need an adaptor and you can use the socket for various applications.

If you’re purchasing a big set, there’s a good chance the sockets and ratchets come in several sizes.

Impact and standard sockets:

Sets that have standard and impact sockets are still uncommon, and the impact sockets will less in number.

Impact sockets cost more, so ask yourself if it is worth buying. If you’re going to do only manual work then there’s no need for impact sockets.

Keep in mind though that manual sockets cannot be used with impact wrenches. If you need to use impact sockets or wrenches on occasion, buy the impact socket and wrenches you need rather than get the entire set.

Deep sockets:

It’s always a good idea to have a few deep sockets in your collection. Even if you often work with standard sockets, you’ll never know when a deep socket might come in handy.

Socket bits:

Robertson, spline, and torx bits are hardly used by most people, but they might come in handy for DIY enthusiasts. Look for a set that includes these bits if you use them

Make sure your set includes Allen key, hex, slot, pozidriv, and Philips screwdriver and socket bits. These are widely used and will come in handy for all kinds of operations and garage work.

Long-term needs:

Do you have any plans of using other sockets or ratchets in the future? If so, now might be a good time to invest in a good set with lots of sockets and accessories.

In the end, only you can determine what the ideal socket set is. But keeping these factors in mind will help you make the right choice.

Top Socket Set Brands

There are lots of socket brands, but these are the best. If you do a search for the top sockets on the web, these are the names you will come across.

SK Hand:

If you read an SK socket set review you’re going to see it gets mostly positive reviews, as SK Hand Tools is one of the top brands in the industry. The company manufactures a wide range of tools including sockets, ratchets and other hand tools.

Craftsman:

Craftsman has been in the industry for a long time, and they have earned a solid reputation for quality. Their sockets in particular are known for durability, quality and versatility.

Bostitch:

this company has earned a well-deserved reputation for quality as well. Their sockets come in different types and sizes to simplify car repair and maintenance.

Tekton:

The name Tekton is what people look for when they buy sockets, and with good reason. While there are a lot of manufacturers out there, Tekton has managed to remain on top by consistent.

Stanley:

Stanley is another brand which has become synonymous with hand tools. Their sockets come in various sizes and are known for providing lots of torque and good performance.

Apex Tool Group:

The Apex Tool Group is one of the largest tool manufacturers on the planet. They are recognized for high quality hand tools, with their sockets highly esteemed by DIY enthusiasts around the world.

Westward:

Westward sockets come in different styles, sizes and shapes, suitable for beginners and advanced users. The brand is also known for their durable hand tools and utilities.

Snap-On:

This brand manufactures different types of sockets to suit the needs of different people. They have entry level sets as well as comprehensive sets for those who need a bit of everything.

Neiko:

Neiko is one of the leading brands for hand tools around the world. They are also known for their high-end impact sockets.

How Socket Sets Made of

Frequently Asked Questions

What is a socket set?

A set contains several sockets of varying sizes. It may also have bits and other accessories to go along with the sockets.

Where are Tekton tools made?

Tekton products, including their sockets, are made in the US.

What is the best tools brand for mechanics?

Tekton, SK Hand Tools, Stanley, Craftsman and Neiko are among the best brands for mechanics and the DIY buff. For more info, check out the best socket brand section in this guide.

What is the difference between regular and impact sockets?

Impact sockets are designed for use with impact wrenches to generate higher torque.

How many sizes are included in a set?

The more pieces included in the set, the more varied the sizes probably are. This information will be in the product description.

Are most sockets made in China?

Many are, but some are still manufactured in the US.

Will this socket size work with my car?

Most sets include the most commonly used sizes, so compatibility won’t be an issue.  Most also have accessories that expand the capabilities of the sockets.

Set X has more pieces than set Y, but set Y is more expensive. Why is that?

Most probably because the set has more deep sockets or impact sockets. The type of sockets included has a bigger effect on the cost than the number of pieces.

What is the standard socket size?

The standard sizes are ¼’, 3/8” and ½”. This is available in most socket sets along with other sizes.

What is the smallest socket size?

Some sockets are just 1/8”, but these are rare and used only for small machines. Some sets may be bundled with unique socket sizes, but most packages come with the most coon sizes.

What is the average warranty length for these products?

There is no average duration as it varies from product to product. However you can expect those from quality brands to last several years or have a lifetime warranty.

How many pieces should I buy?

It depends on your current needs. Most car owners and DIY enthusiasts will be happy with a 30 or 50 piece set, but there are 99 or 200 piece sets for home use available as well.

I am trying to loosen up a rusty fastener and it won’t budge. What is wrong?

A: You need a socket wrench with a higher torque. Rusty fasteners or those that have been screwed too tightly need more power.

Final Verdict

It is my hope that this guide has given you an idea of what sockets to buy. If you own a car or just like to tinker around, having a good range of sockets is necessary to do work and maintenance.

There is no lacking of sockets online, and that is part of the problem. Some people end up buying whatever sockets they see, not realizing the quality, pieces and socket type makes a difference.

So if you’ve got a car and like to do the maintenance, do yourself a favor and get the best socket set today.

10 Cool Things to Do With a Dremel Tool

A Dremel tool comes in handy with some other accessories that can be used for different tasks. The Rotary kit contains tools which can be used for grinding, sharpening, cutting, drilling and polishing to mention but a few.

Likewise, the Dremel tool can be used to accomplish several tasks.

The great benefit of a Dremel tool is the DIY feature which allows you to carry out tasks all by yourself.

You can use the Dremel tool on wood, plastic, glass, metals and even electronics. I have covered some 10 cool things you can do with the Dremel tool.

Project 1: Cutting small cuts on objects

The Dremel tool is very effective when it comes to getting you small cuts; be they from wood, metals or any other materials.

This is owing to the fact that you can easily hold it with your hands and move it along the line of the cut.

In case you need small cuts which are perfectly done without relying on a saw, then Dremel tool is the perfect option for you.


Project 2: Cutting objects at a regulated speed

The Dremel tool allows you to regulate the speed at which you are doing your cuts. This ensures that you do not have irregular cuts due to the high speed of the tool.

To make it even more user-friendly, the Dremel tool comes with a manual that tells you the recommended speed when cutting different materials.

This regulated speed makes you produce well-finished cuts with the desired edges. The sound of the motor is crucial in guiding you as far as speed is concerned during the use of the gadget.

Project 3: Cutting plastic

Getting a perfect cut from a plastic material is really challenging at the workshop but not when using the Dremel tool.

All you need to do is set the right speed for the Dremel tool; mostly between 4 and 8 and you are good to go.

The Dremel tool will smoothly cut the plastic material into the desired cuts with ease. It is important to always have your protective gear on so as not to damage your eyes or ears.

Do not also use massive pressure on the Dremel tool as this may lead to its damage.

Project 4: Metal cutting

Before the acquisition of a Dremel tool, metal cutting in my workshop was quite a tiresome and hectic task. Not anymore now.

The Dremel tool allows you to get a good cut from a metallic material easily and faster. All you need is hold the Dremel tool in your hands, put on the ears and eyes protection, adjusts the Dremel speed to around 8 and 10 and you are good to go.

The Dremel tool you use for cutting metals should be reinforced with fiber materials to make them more durable. With Dremel tool, metal cutting becomes as smooth as wood cutting.

Project 5: Grinding

Dremel tool is so effective in grinding that it produces finely ground end products. This is made possible by the grinding stone that is always attached to the Dremel tool.

Once attached, you are required to turn on your Dremel tool and hold the grinding stone against the material to be ground.

This should be done gently and at a low setting in a way that the material being ground doesn’t overheat.

Project 6: Sharpening

In the event that you need to sharpen another tool and do it well, then you need the Dremel tool.

You will need to hold the material to be sharpened with your left hand, attach the sharpening tool to the head of the Dremel tool, put on your protective gear, and then hold the Dremel tool against the tool to be sharpened at a low setting.

Gently move the Dremel tool against the tool to be sharpened along the surface that needs sharpening.

The speed of the Dremel should be moderate between 4 and 8. The pressure you apply on the Dremel tool should be moderate too.

Project 7: Sanding

With the Dremel tool at your disposal, sanding becomes a very easy task. The products you are working on also become finely finished when sanding is done with the aid of the Dremel tool. You need to attach the sanding paper to the head of the Dremel tool.

Once you are sure the sandpaper is firmly held by the screw at the Dremel tool head, then turn on the Dremel tool with its speed ranging between 2 and 10.

This should be done at a low setting when dealing with plastic related products and a higher setting for metal products. Ensure the sanding paper is in contact with the material being sand as you move the Dremel tool.

Project 8: Polishing

The Dremel tool provides the best solution when you need metal or plastic material polishing.

All you need to do is apply the polishing component on the material surface then fit your Dremel tool with a polishing wheel. Start your gadget and ensure the speed is at 2.

Avoid high speed as this might end up causing even polishing.

Project 9: Shaping

With the presence of the Dremel tool, the shape of your products should never be a bother. The Dremel tool allows you to shape products to their desired shapes after the product has been finished in its making.

All you need is fit the cutting disk onto the head of the Dremel tool then turn on the gadget. Cut out the edges of the product that you deem unwanted and come up with the perfect shape.

Project 10: Buffing wood

Wood products especially furniture will always catch the eyes of the client when they have that fine smooth finishing. This is where a Dremel tool comes in. You will require having a smoothening compound applied onto the wood then using the smoothening bit fixed on the Dremel tool give your wood products the desired finish.

Final Words

Working in a workshop requires you to have the right tools to help you work on your products quickly, precisely and to the required standards. For this, you need to identify various tools that can aid you in accomplishing all these.

The Dremel tool is such an important tool as it can be put into more than one use. This makes it very economical to have it in your workshop. You like to check out the Top 6 Easiest Dremel Tool Projects for Beginners too.

All you need is to take good care of the tool by proper cleaning after use to make it durable. Your safety too should be of priority when using a Dremel tool so ensure you put on the protective gear.

Click Here To Find The Best Price Today

How to Cut tile with a Dremel Rotary Tool

How to Cut tile with a Dremel Rotary Tool
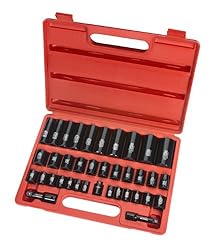
Have you ever try to cut tiles for your home improvement? Are you planning to kick-off your tile cutting project with a Dremel Rotary Tool? Do you want to know proper techniques to finish your project with optimal perfection?

If your answer is positive then you are in the right place to learn in detail process of how to cut tile with a rotary tool especially using a Dremel brand.

You never escape cutting tiles even a tiny piece while you are fixing your tiles on the wall or floor.

You just need to buy some bit shapes with different sizes to complete your cutting project on top.

Although, cutting tiles is not easy tasks but if you have decent tools. You have to do some rehearsal before starting your main cutting job. Be sure that you have some extra tile at the beginning of your cutting project to reduce the risk.

You need to practice to make a straight cut, cut a shape, cut small shapes and some other different shapes so that it makes you an expert.

Things need to consider:

If you want to be a professional tiles cutter then go for bit expensive Dremel rotary tools. You should start your own tiling project that makes you popular with others.

However, if you tiling project just around your home then you may hire a tile cutter to save additional costs.

You do not need to spend extra money for your one-time project. You can find lots of hiring tools available in your local tiles store.

You have to do the bulk job at the of start working on tile cutter. You need to consider what types of material you are going to cut including vinyl, porcelain, granite, mosaic, marble tiles on the basis of their thickness and area.

This judgment will help you to select appropriate cutter do perform your work. If you want to cut porcelain or ceramic tile for the small project you need to have a snap cutter to get your job amazingly done.

However, you need to consider many different cuts for large projects. So, you need a powerful cutter to make your job easier in a large project.

Selection of tiles cutter:

If you want to make straight cuts just think for Snap cutter. You have to clutch the tiles after selecting the position that allows you to notch up the cut line.  So, you able cut into two parts of your tiles.

If your budget is low and wants less complicated cutter then go for Snap cutter or rail cutter. Because Snap cutter is suitable for your own projects and other one is the best use for glossy and polished cutting action.

If you are actively involved with large cutting use a wet saw that makes the job quick and simple. Also, you can minimize dust level that will come out of the saw so you must wear safety glasses to reduce your physical injury.

Also, you need to use a correct power tool for smooth operation. Because best match tool will perform the job better and also safer during your cutting time.

The Dremel brand produces many options for cutting tile just you need to select your options and the type you need to cut.

There are two accessory and attachment options included with the Dremel rotary tile. It has 45-degree angle and you can adjust the cutting depth to involve the bits of tire cutting base.

Extended cutting may need different accessories. You should not put too much pressure while cutting tiles on the wall otherwise you may contact wires into the wall and cause serious personal damage.

Now I will discuss the following process that will help you to perform your cutting task in a simple way:

Procedures for Straight cut:

Process 1:

You need to use a pencil or any kind of temporary marker and put a mark where the tile needs to be cut. And please keep in mind that you have to cut smaller hole onto the tile than marking the spot. A smaller hole will allow you grout joints properly.

Process 2:

You have to place the tile into the tile cutter for cutting. You have to operate scorer across the tile but make sure it will once only. This process creates a spilled point.

Process 3:

You have to push downhill the breaker and it will produce a nice, clean, and smooth tile cut.

Procedures for a shape cut:

You may need to cut around a diffusion or want to make a round hole in the doorframe. You need to make a shape cut that time.

You should us an electric grinder to make a hole into the surface. You need to cut from the side then do cutting in the middle.

You have to break the small pieces of the tiles by using tile nibblers till you reach your desired shape.

Always, try small cutting at a time for your accuracy and standard time frame. You must not break up the whole shape on your first attempt take your time to make more perfect.

Now I am going to tell you a summarize process that needs your cutting work done properly:

Summarized procedures:

  • Use tool collet for inserting Dremel tool bit.
  • Make sure you tighten the collet properly.
  • Plug in the tool to get a proper power supply.
  • Turn on the tool and use the rotation from 25000 to 35000 rpm.
  • Hold on to the tile securely and use the cutting bit for drill work.
  • Continue the tasks until the cut is done.
  • Switched off the Dremel
  • Use adhesive tape to the tile and place them back into the wall or your required place.

Cutting Tile: Choosing the Right Tool

[su_youtube_advanced url=”https://www.youtube.com/embed/z9yCv-cMFfY” controls=”no” rel=”no” modestbranding=”yes” https=”yes”]

Final words:

To cut tile perfectly is not a difficult job rather your need to involve an extensive time for practice. It is all about using your common sense and some kind of basic measurement skills. But after some time when you are involving several tiles cutting project, of course, you will be expert and clearly understand of how to cut tile by using your Dremel bit.

How to Change Dremel bit – A Step by Step Guide

How to Change Dremel bitDid you already buy your Dremel rotary tool? Are you feeling stress to change your Dremel Bit? Or even do you want to know how to change drill bits?

Then you have come to the right article to get to know the step by step process of changing your bits without less or no hassle.

In my article, I will show you simple and easy steps so that it will act as your own personal guide. Just spend only a few minutes and stick to read my article once, definitely, you will learn the amazing drill bits changing system.

So, keep reading!!

Key information you need to know:

So, before start working with your drill, you have to learn the uses of this versatile tool. Also, you must know how to install a bit and remove it to make your drill works quicker and simpler.

First, you must protect your eyes with protective sunglasses that are anti-fog coating enabled. Because when you drill into iron and steel it generates sparks and sometimes it may cause severe damage to your eyes.

Next stage, if you are at the beginner’s level not start tackling complex project yet you just need to go for general purpose twist drills that have 135- degree split point.

It is enough to start your drill work with 15-20 piece set. You can buy longer, larger bits separately for your convenient time.

If you do not use your drill then mark the shaft of the drill bit with masking tape or you can use a drill stop.

All in all, if you take longer to drive fasteners then you need a replaceable drive bits kit. Just you need to insert the drive bit to an extension for making them extra long reach.

Inserting a drill bit in the chuck:

The chuck is used for holding the bit during the drill work. There are three jaws inside the chuck that you only able to see when revolving the collar. The key points you must keep in mind that when installing a bit make sure it is centered all of the jaws of the chuck.

Types of chuck:

Dremel bit highspeed cutter

Photo by Chris Sammis/ CC BY

There are two types of chuck that are commonly using to hold the drill bit. First one is keyless chuck that is used for most portable drills. You need to insert a drill bit between jaws and rotate the collar till it gets tight.

Another chuck you can use for your woodshop named keyed chuck. You may find this chuck older or larger drills or in a drill press.  You need to apply same procedures as you use for keyless chuck.

So, what about your confidence level of using your Dremel tool? I just consider it’s boosted and now I will answer your million dollar question. Otherwise, you may start talking come on man! I need to know how to change a Dremel bit.

I will explain this process into different steps that you need to go through in the following way:

As I mentioned earlier that you must oblige all safety measures the time you are using your tool. This part of the article will assist you in the different stages of how efficiently you able to remove and insert Dremel bits.

Process 1: Push the shaft lock button and hold for few moments:

Before changing the bit you need to press the shaft lock switch. You may see it has a button that keeps the shaft close to the front side of the Dremel.

You have to follow a common rule to ensure your hands are not wet during the bit changing process.

Process 2: Take away the collet

When you open the shaft lock control, the collet metal nut will be losing automatically. You realize it just touch by using your fingers. You need to turn the collet towards antilock direction till you able to separate from the tool.

Process 3: Disconnect the synthetic cup

You find an attached plastic housing cup come along with the device. You need to detach the plastic synthetic mug till comes on your hand.

You keep in mind that do not power otherwise you may finish your task just destroying the threads.

Process 4: Separate the collet from the shaft

In this process you have to take away the collet from the motor shaft softly otherwise it may damage and you cannot use it for further. It’s a tiny metal comes with silver color and back is narrower and has a comparatively wider front.

Once you have detached make sure that you place it inside the metal collet nut. When inserting it is important always to make sure that it is tightly fixed in the metallic nut that holds the collet because if it is loosely attached, it will not be able to function.

Process 5: Inserting the bit

Bits

Photo by Maik/ CC BY

After inserting the nut into metal collet you need to pop in the Dremel bit inside the collet all the way to collet nut. Just be remember Dremel device has 4 separate collet sizes and you can use them according to your requirement.

Just keep in mind you tight the nut proper and there is not room for movement or twisting.

Process 6: Fixing them back again:

The essential parts that you removed from the drill need to fix them back again to finish installing drill bit. First tighten the plastic cup softly then put back the collet inside the motor driving shaft and if the bit is fixed holding the collet just above the accumulated components.

Finally, just tightening collet by using your hands then use the fastening button just ensure the Dremel bit and collet locked by you.

You have to click the sound that will provide you accurate information whether the tool bit has locked or not.

You can now use your Dremel tool for various purposes and the ultimate tasks that you need to do.

Finally, I expect these informative contents really helpful for your to change your Dremel tool.

Dremel Flexshaft – Mounting And Example Of Use

 Final words:

All in all, I hope this article has helped to understand how to change Dremel bit of your Dremel tool.

You already know that you do not need to be a professional assistance using this particular tool.

Thus. It is very important to know how to change Dremel bit and does not forget to comply the overall safety procedures.

This, therefore, means that there is essentially no professional input required in using this particular tool. Thus, the significance of knowing how to remove and insert different types of Dremel bits in this tool.

Click Here To Find The Best Price Today